Documentation
UVdesk - Spam Settings
UVdesk has the feature to block unwanted spam messages popping up again and again into your Mailbox. These spam messages are annoying and consume a lot of space as well.
Steps to blacklisting and whitelisting the particular senders:
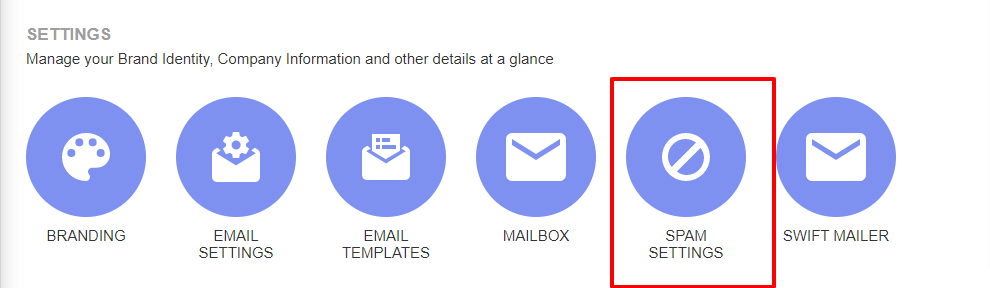
- Login to your UVdesk Support Panel.
- On the Dashboard, you will see "SETTINGS" menu and under it, you will find "Spam Settings".
- Click on the "Spam Settings" icon and then you will see Blacklist and Whitelist boxes.
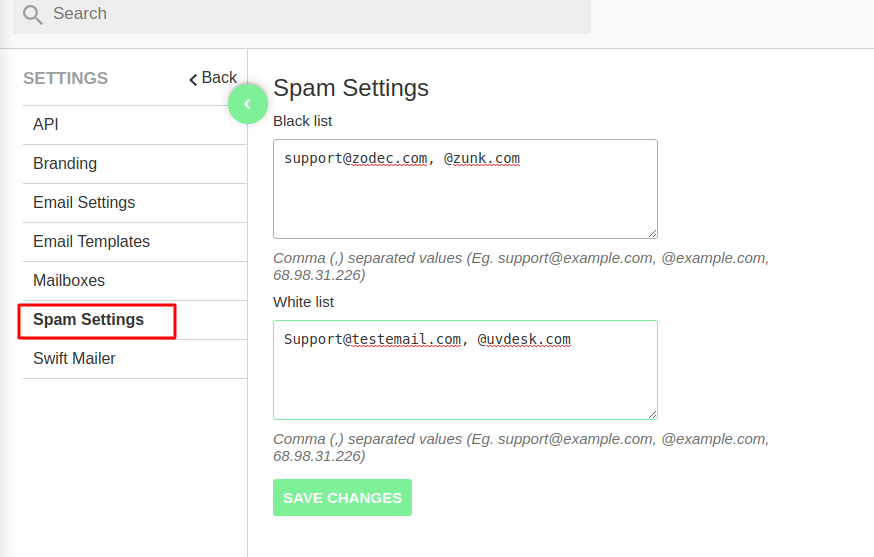
Blacklist- It will reject all the messages which are coming from the specific sender ( email address or I.P Address) which are entered in the box of the blacklist.
Whitelist- It will accept all the messages which are coming from the sender ( email address or I.P Address) which are entered in the box of the whitelist.
These two boxes will accept the following:
- An Email address.
- Domain Name.
- IP Address.
Points to Ponder:
By entering the IP address of the users in the box of the blacklist, they will get completely restricted visiting the support site.
If we put the same data in the two boxes then what's the use of having the white list?
The answer is that if we enter the email address like company@support.com and domain as @support.com in both the boxes then in that condition the users with that domain name will be barred from submitting tickets.
But, the user whose complete email address (company@support.com) has entered in the white box with the same domain will have the access to the site and submit the support requests.